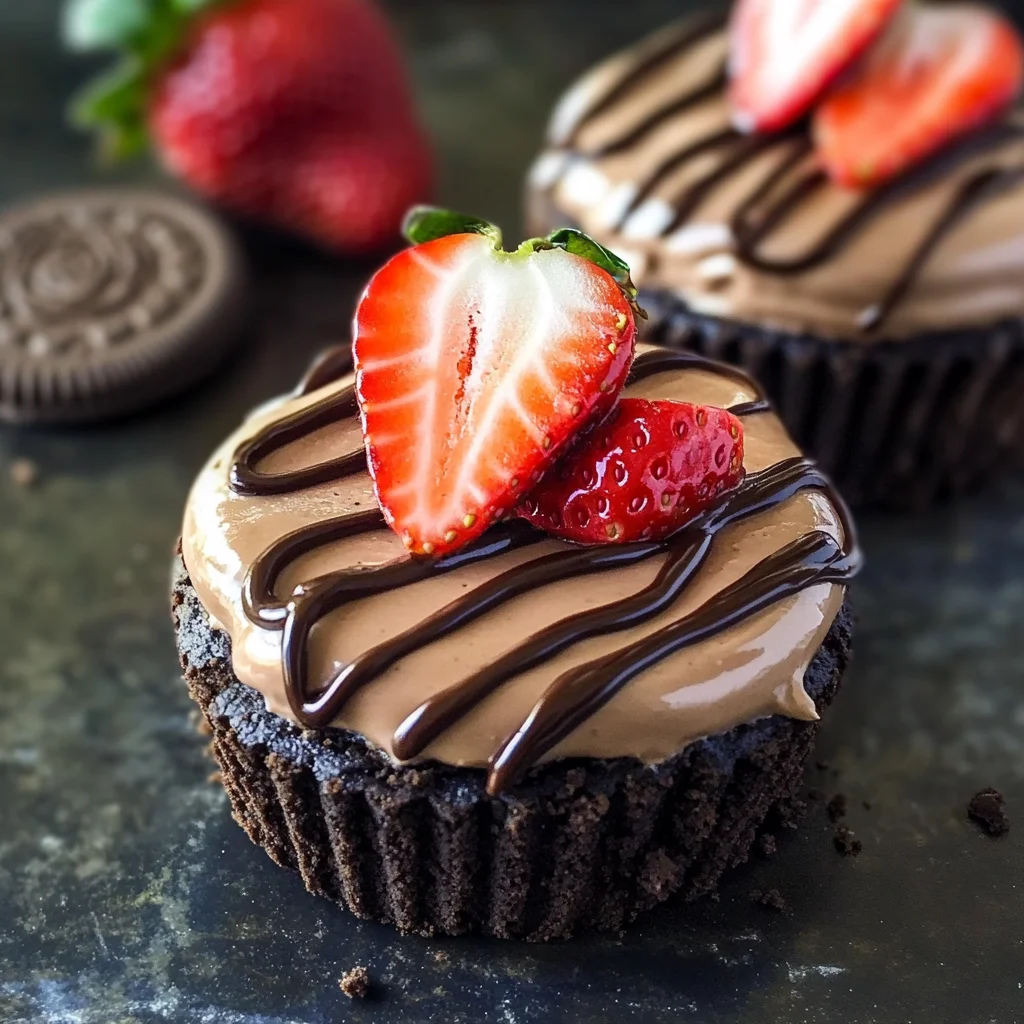
These No Bake Mini Chocolate Cheesecakes are the perfect sweet treat for any occasion. Their creamy texture combined with a crunchy Oreo cookie crust makes them irresistible. Whether it’s Valentine’s Day or just a casual gathering, these mini desserts will impress. Plus, they are incredibly easy to make, requiring no baking at all!
Why You’ll Love This Recipe
Quick and Easy: With just 30 minutes of prep time, you can create these delicious mini cheesecakes without breaking a sweat.
Irresistible Flavor: The combination of rich chocolate and smooth cream cheese creates a decadent dessert that everyone will love.
Versatile Presentation: Perfectly sized for individual servings, these cheesecakes are great for parties or as a personal treat.
No Baking Required: Enjoy the ease of making these cheesecakes without needing to turn on your oven.
Customizable Toppings: Feel free to add fresh fruits or other toppings to suit your taste.
Tools and Preparation
Before diving into the ingredients, gather your tools to ensure a smooth preparation process.
Essential Tools and Equipment
Mixing bowls
Electric mixer
Measuring cups and spoons
Spatula
Muffin tin
Importance of Each Tool
Electric mixer: Helps achieve a creamy and smooth filling by thoroughly blending the cream cheese and other ingredients.
Muffin tin: Ideal for shaping the mini cheesecakes while allowing for easy removal once set.
Ingredients
Here’s what you need to whip up these delightful No Bake Mini Chocolate Cheesecakes:
For the Crust
27 Oreos
6 Tablespoons Butter (melted)
For the Filling
3/4 Cup Heavy Cream
10 Ounces Cream Cheese (softened)
3/4 Cup Powdered Sugar
1/3 Cup Sour Cream
6 Ounces Semi-Sweet Chocolate (melted)
1/3 Cup Chocolate Chips (melted)
For Garnishing
Fresh Strawberries
How to Make No Bake Mini Chocolate Cheesecakes
Step 1: Prepare the Crust
In a mixing bowl, crush the Oreos into fine crumbs.
Add melted butter to the crumbs and mix until well combined.
Evenly distribute the mixture into a muffin tin, pressing down firmly to form a crust.
Step 2: Make the Filling
In another bowl, beat together softened cream cheese and powdered sugar using an electric mixer until smooth.
Gradually add in heavy cream while continuing to beat until fluffy.
Mix in sour cream and melted semi-sweet chocolate, blending until fully incorporated.
Step 3: Assemble the Cheesecakes
Spoon the filling over each prepared crust in the muffin tin.
Smooth out the tops with a spatula for an even finish.
Step 4: Chill and Serve
Refrigerate the cheesecakes for at least 30 minutes to allow them to set.
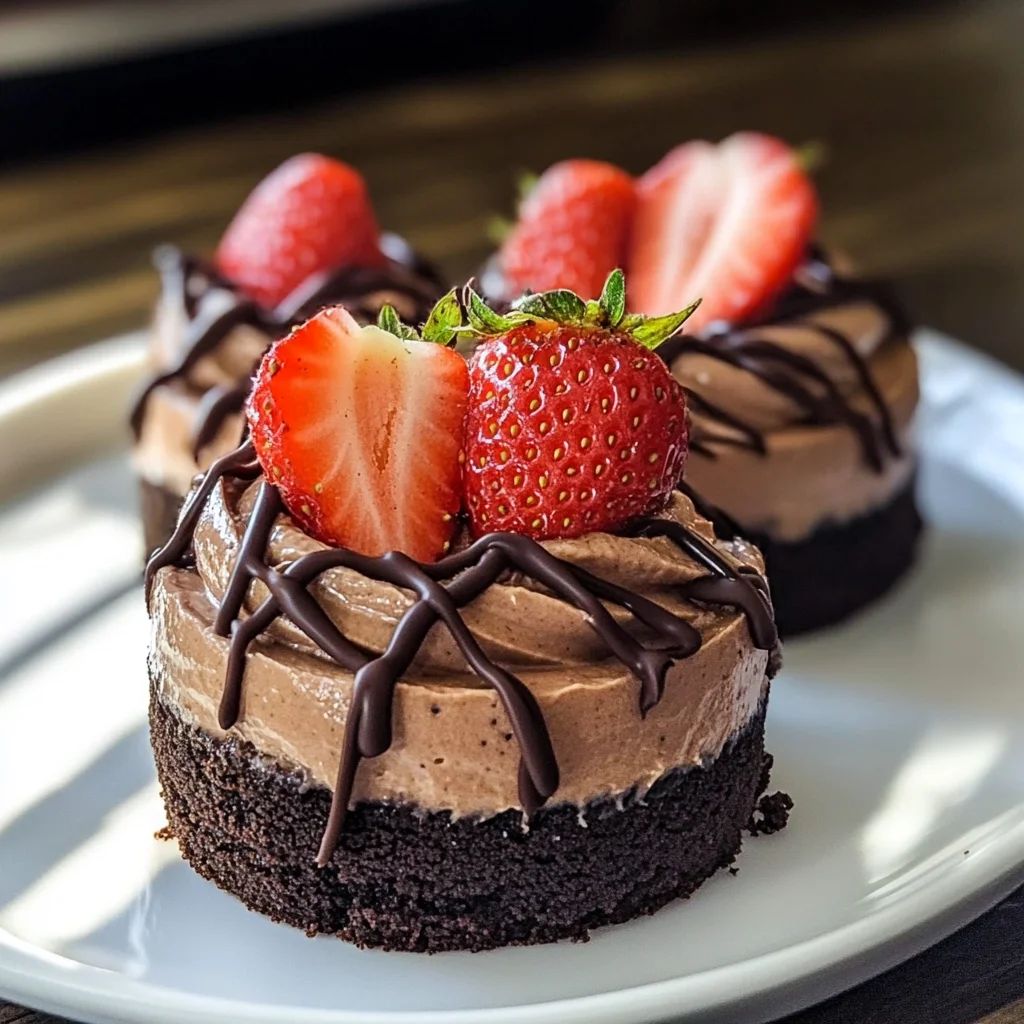
Once set, carefully remove from muffin tins and garnish with melted chocolate chips and fresh strawberries before serving.
Enjoy your delicious No Bake Mini Chocolate Cheesecakes!
How to Serve No Bake Mini Chocolate Cheesecakes
These no bake mini chocolate cheesecakes are a delightful treat that can be served in various ways to impress your guests or simply enjoy at home. Here are some serving suggestions to elevate this dessert experience.
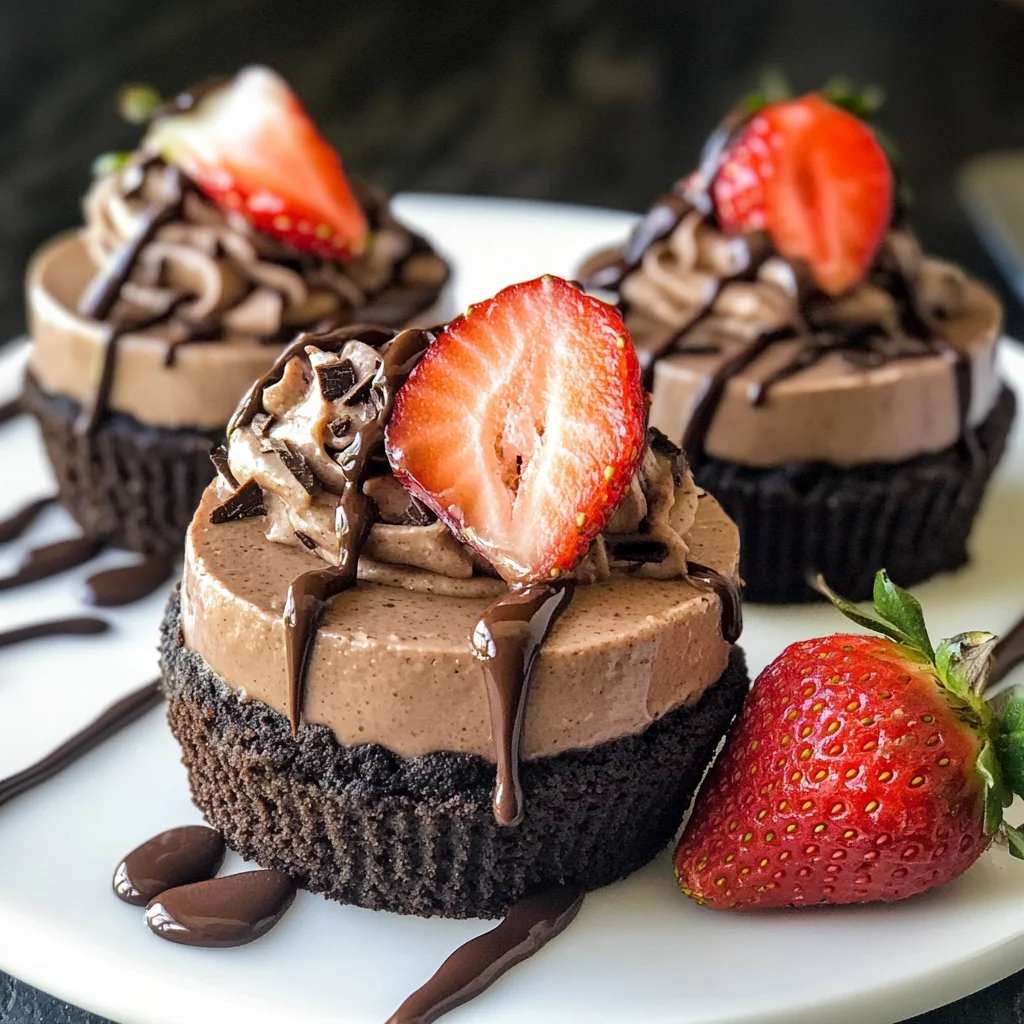
Garnished with Fresh Berries
Top each cheesecake with fresh strawberries, raspberries, or blueberries for a burst of color and flavor.
Whipped Cream Dollops
Add a generous dollop of whipped cream on top for extra creaminess and a beautiful presentation.
Chocolate Drizzle
Drizzle melted semi-sweet chocolate over the cheesecakes for an indulgent touch that enhances the chocolate flavor.
Oreo Crumbles
Sprinkle crushed Oreo cookies on top for added texture and to tie in the crust flavor.
Mint Leaves
Garnish with fresh mint leaves for a refreshing contrast that complements the sweetness of the cheesecake.
Individual Serving Cups
Serve each mini cheesecake in clear cups to showcase the layers and make for easy individual servings at parties.
How to Perfect No Bake Mini Chocolate Cheesecakes
To ensure your no bake mini chocolate cheesecakes turn out perfectly every time, follow these helpful tips.
Use Room Temperature Ingredients: Allow your cream cheese and sour cream to sit at room temperature before mixing. This will help achieve a smooth texture without lumps.
Melt Chocolate Carefully: Melt your semi-sweet chocolate using a double boiler or microwave in short bursts. This prevents burning and ensures a silky finish.
Chill Thoroughly: After assembling, refrigerate the cheesecakes for at least 4 hours or overnight. This allows them to set properly and develop their full flavor.
Don’t Overmix: When combining ingredients, mix until just combined. Overmixing can introduce too much air, leading to cracks when they set.
Adjust Sweetness: Taste the filling before pouring it into the crust. You can adjust the powdered sugar according to your sweetness preference.
Best Side Dishes for No Bake Mini Chocolate Cheesecakes
Pairing your no bake mini chocolate cheesecakes with complementary side dishes can enhance your dessert experience. Here are some great options:
Fresh Fruit Salad: A mix of seasonal fruits adds freshness and balances the richness of the cheesecake.
Chocolate Dipped Strawberries: These sweet treats echo the chocolate theme while adding an elegant touch that guests will love.
Vanilla Ice Cream: A scoop of creamy vanilla ice cream provides a classic contrast to the rich chocolate flavor of the cheesecake.
Coffee or Espresso: The bitterness of coffee pairs well with sweet desserts, enhancing their flavors while providing a nice caffeine kick.
Nutty Granola: A sprinkle of nutty granola adds crunch and earthiness that complements the smooth texture of the cheesecake.
Caramel Sauce: A drizzle of warm caramel sauce creates an additional layer of sweetness that pairs beautifully with chocolate desserts.
Mini Biscotti: These crunchy cookies serve as great dippers alongside each cheesecake, adding variety to your dessert spread.
Common Mistakes to Avoid
Making No Bake Mini Chocolate Cheesecakes can be simple, but a few common mistakes can lead to disappointing results. Here’s how to avoid them:
Skipping the chilling time: Not allowing your cheesecakes to chill properly can result in a runny texture. Always refrigerate for at least 4 hours before serving.
Using cold cream cheese: Starting with cold cream cheese can lead to lumps in your filling. Make sure it’s softened at room temperature for a smooth mixture.
Overmixing the filling: Mixing too vigorously can incorporate too much air, leading to cracks as they set. Mix just until combined for a perfect texture.
Not measuring ingredients accurately: Eyeballing your ingredients can affect the balance of flavors and textures. Use precise measurements for best results.
Using warm chocolate: Adding warm melted chocolate directly into the filling can cause it to become too soft. Allow it to cool slightly before incorporating.
Storage & Reheating Instructions
Refrigerator Storage
Store your No Bake Mini Chocolate Cheesecakes in an airtight container.
They will last up to 5 days in the refrigerator.
Freezing No Bake Mini Chocolate Cheesecakes
Place individual cheesecakes in freezer-safe containers or wrap them tightly.
These cheesecakes can be frozen for up to 2 months.
Reheating No Bake Mini Chocolate Cheesecakes
Oven: Preheat to 300°F (150°C) and gently warm for about 10 minutes. This method is not common for no-bake desserts, but it works if needed.
Microwave: Heat on low power in short bursts of 10-15 seconds until just softened.
Stovetop: Use a double boiler method, placing the cheesecake in a bowl over simmering water, stirring gently until warmed through.
Frequently Asked Questions
Here are some common questions about making No Bake Mini Chocolate Cheesecakes:
Can I use different cookies for the crust?
You can! While Oreos provide great flavor, feel free to experiment with other cookie types like graham crackers or chocolate wafers.
How do I make this recipe gluten-free?
To make gluten-free No Bake Mini Chocolate Cheesecakes, simply use gluten-free cookies for the crust and ensure all other ingredients are certified gluten-free.
How long do No Bake Mini Chocolate Cheesecakes need to chill?
They should chill for at least 4 hours or overnight for best results. This helps them firm up properly.
Can I customize the toppings?
Absolutely! You can top these cheesecakes with fresh fruit, whipped cream, or even additional melted chocolate for added flair.
Final Thoughts
No Bake Mini Chocolate Cheesecakes are not only delicious but also incredibly versatile. You can adjust toppings and crusts based on personal preferences or seasonal fruits. Give this recipe a try, and enjoy a delightful treat that’s perfect for any occasion!
Indulge in the rich and creamy delight of No Bake Mini Chocolate Cheesecakes, perfect for any occasion. These little treats combine a luscious chocolate filling with a crunchy cookie crust, making them irresistible to chocolate lovers. The best part? They require no baking, allowing you to whip up a batch in just 30 minutes! Whether you’re celebrating a special event or enjoying a casual gathering, these mini cheesecakes are sure to impress your guests. Customize them with fresh berries, whipped cream, or a drizzle of melted chocolate for an extra touch of indulgence.
Ingredients
Scale
27 Oreos
6 tablespoons butter (melted)
3/4 cup heavy cream
10 ounces cream cheese (softened)
3/4 cup powdered sugar
1/3 cup sour cream
6 ounces semi-sweet chocolate (melted)
Fresh strawberries for garnish
Instructions
For the crust, crush the Oreos into fine crumbs and mix with melted butter. Press firmly into a muffin tin.
For the filling, beat softened cream cheese and powdered sugar until smooth. Gradually add heavy cream while mixing until fluffy. Stir in sour cream and melted chocolate.
Spoon the filling over each crust and smooth the tops.
Chill in the refrigerator for at least 30 minutes before serving, garnished with strawberries.
Prep Time:30 minutes
Cook Time:None
Category:Dessert
Method:No Bake
Cuisine:American
Nutrition
Serving Size:1 cheesecake (60g)
Calories:250
Sugar:18g
Sodium:130mg
Fat:17g
Saturated Fat:9g
Unsaturated Fat:7g
Trans Fat:0g
Carbohydrates:22g
Fiber:1g
Protein:3g
Cholesterol:40mg
Keywords: Allow cream cheese and sour cream to reach room temperature for easy blending. Use different cookies to customize the crust if desired. Adjust sweetness by tasting the filling before setting.