Physical Address
304 North Cardinal St.
Dorchester Center, MA 02124
Physical Address
304 North Cardinal St.
Dorchester Center, MA 02124


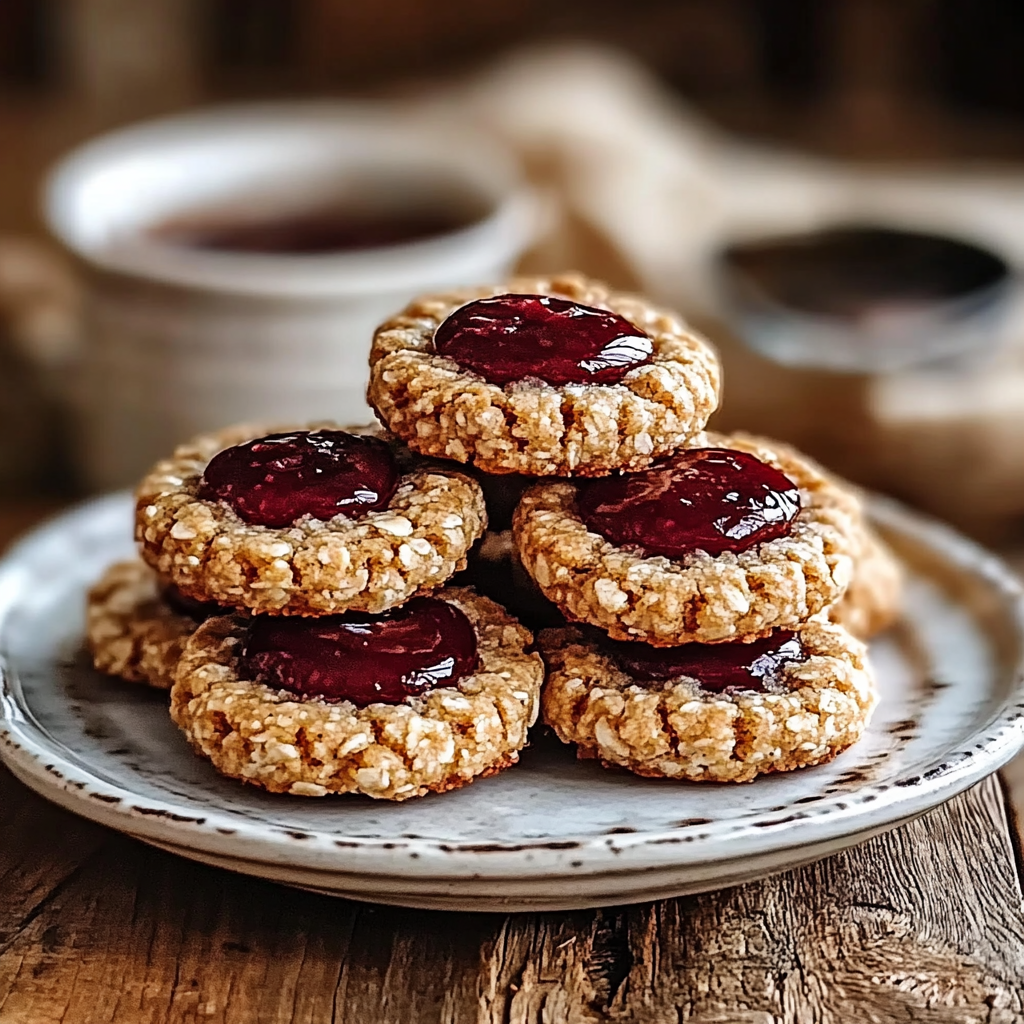
The aroma of freshly baked cookies wafts through the air, mingling with the anticipation of that first warm bite. Thumbprint cookies, with their rich buttery texture and luscious fruit preserves nestled in the center, are not just a treat; they’re a celebration of flavors and memories waiting to unfold.
Picture this: It’s a rainy afternoon, and you’re cozied up in the kitchen with your favorite playlist humming softly in the background. As you roll those little dough balls and create perfect indents for the sweet filling, you can’t help but smile at the memories of baking these delightful cookies with family or friends. They’re perfect for any occasion—be it a cozy gathering or simply to brighten up your day. Let’s dive into this delicious adventure!
Here’s what you’ll need to make this delicious dish:
All-Purpose Flour: This is the base of your cookie dough. Choose a good quality flour for best results.
Unsalted Butter: Use room temperature butter for easy mixing; it adds that rich flavor we all love.
Sugar: Granulated sugar gives sweetness and helps achieve a lovely golden color when baked.
Brown Sugar: This adds moisture and depth of flavor, creating cookies that are chewy on the inside.
Egg Yolk: Just one yolk helps bind everything together while keeping the cookies tender.
Vanilla Extract: A splash of vanilla elevates the flavor profile; go for pure extract if possible!
Fruit Preserves: Your choice! Raspberry or apricot preserves work beautifully as fillings.
The full ingredients list, including measurements, is provided in the recipe card directly below.
Follow these simple steps to prepare this delicious dish:
Step 1: Preheat Your Oven
Preheat your oven to 350°F (175°C). Line two baking sheets with parchment paper so your cookies don’t stick!
Step 2: Mix It Up
In a large bowl, cream together unsalted butter, granulated sugar, and brown sugar until light and fluffy. You can use an electric mixer or go old school with a wooden spoon—just remember to put some muscle into it!
Step 3: Add The Goodies
Beat in the egg yolk and vanilla extract until well combined. Your mixture should smell heavenly by now—like a warm hug from grandma.
Step 4: Flour Power
Gradually add all-purpose flour to your butter mixture. Mix until just combined; don’t overwork it unless you want tough cookies (and nobody wants that).
Step 5: Roll And Indent
Scoop out tablespoon-sized portions of dough and roll them into balls. Place them on your prepared baking sheets about two inches apart. Now comes the fun part—use your thumb (or a spoon) to create an indent in each ball.
Step 6: Fill Those Indents
Spoon about half a teaspoon of fruit preserves into each indentation. Don’t be shy; those little pools of joy are what make these cookies legendary!
Now pop those trays into the preheated oven and let them bake for about 12-15 minutes or until they are lightly golden around the edges.
Transfer to plates once cooled slightly — maybe even sneak one while they’re warm for good measure! These thumbprint cookies will surely bring smiles to every face around you.
Enjoy every crumb and celebrate those sweet moments with friends and family!
Start by preparing your dough, then chill it while you preheat the oven. Roll the dough into balls, create indents for the filling, and bake until golden. This sequence ensures a perfect cookie with a warm, gooey center.
Feel free to swap out the jam for chocolate ganache or nut butter for a unique twist! You can also experiment with flavored extracts like almond or coconut to elevate your thumbprint cookie experience.
Store your thumbprint cookies in an airtight container at room temperature for up to one week. If you need to reheat them, pop them in the microwave for just a few seconds to bring back that fresh-baked goodness.
The first time I made these thumbprint cookies, my friends devoured them in minutes, leaving me wondering if I should have made a double batch! Their laughter echoed through the kitchen as they begged for more.
To make delicious Thumbprint Cookies, gather the following ingredients: 1 cup of unsalted butter, softened; 2/3 cup of sugar; 1 teaspoon of vanilla extract; 2 cups of all-purpose flour; and a pinch of salt. For the filling, use your favorite fruit jam or preserves, such as raspberry or apricot. You can also try using citrus juices for a unique twist. This combination creates a delightful treat that is perfect for any occasion.
To keep your Thumbprint Cookies fresh, store them in an airtight container at room temperature. They will remain tasty for about one week. For longer storage, consider freezing them. Place the cookies in a single layer on a baking sheet until firm, then transfer them to a freezer-safe bag or container. They can stay frozen for up to three months and still taste great when thawed.
Absolutely! While traditional Thumbprint Cookies often feature fruit jams, you can get creative with your fillings. Options include chocolate ganache, nut butter, or even lemon curd. Just ensure that whatever you choose complements the buttery cookie base. Experimenting with different flavors allows you to personalize each batch and delight your family and friends.
Thumbprint Cookies are perfect for various special occasions! Their charming appearance and delightful taste make them an excellent choice for holiday gatherings, birthdays, or even casual get-togethers. You can also decorate them with colorful sprinkles or drizzle melted chocolate on top to elevate their presentation. These cookies are sure to impress guests and bring joy to any celebration.
In summary, Thumbprint Cookies are a delightful treat that combines simplicity and flavor. With just a few basic ingredients like butter, sugar, and flour, you can create these charming cookies filled with your favorite jams or spreads. Remember to store them properly to maintain freshness and feel free to customize the fillings according to your taste preferences. Whether enjoyed during holidays or shared at gatherings, these cookies will surely be a hit!

Thumbprint cookies are a delightful treat that combines a rich buttery dough with vibrant fruit preserves, making every bite an unforgettable flavor experience. Perfect for any occasion, these charming cookies will fill your home with warmth and nostalgia. Easy to make and even more enjoyable to share, they are a must-try for bakers of all skill levels.
Keywords: - Chill the dough for 30 minutes before rolling for thicker cookies. - Experiment with different fillings like chocolate ganache or lemon curd for unique flavors.